Here’s how much clearance the PBM toe rods offer… The rear is half an inch away from being slammed on Stance GR+ Pro coilovers and there is tons of clearance betwee the rod and subframe. Pretty sweet.
![]()

Here’s how much clearance the PBM toe rods offer… The rear is half an inch away from being slammed on Stance GR+ Pro coilovers and there is tons of clearance betwee the rod and subframe. Pretty sweet.
![]()
SO just about finished with paint. Got one more coat of clear to throw on there.
All together not too bad for doing it all on my own for the first time in a garage haha. There was one area where i either didn’t de-grease well enough or it just got too thick in the temp i’m working in. (40 degrees.. :/).
I’ll probably end up taping that area off and sand it down, and re-spray. Then wetsand the paint lines down or something. Any ideas?
Otherwise not bad. Will post pics about 20 min after the next coat. SO like 40 min to an hour. Whenever i get a chance.
You can already see the gold pearl in the garage with just a flourescent light. Can’t wait to see what it looks like in the sun!
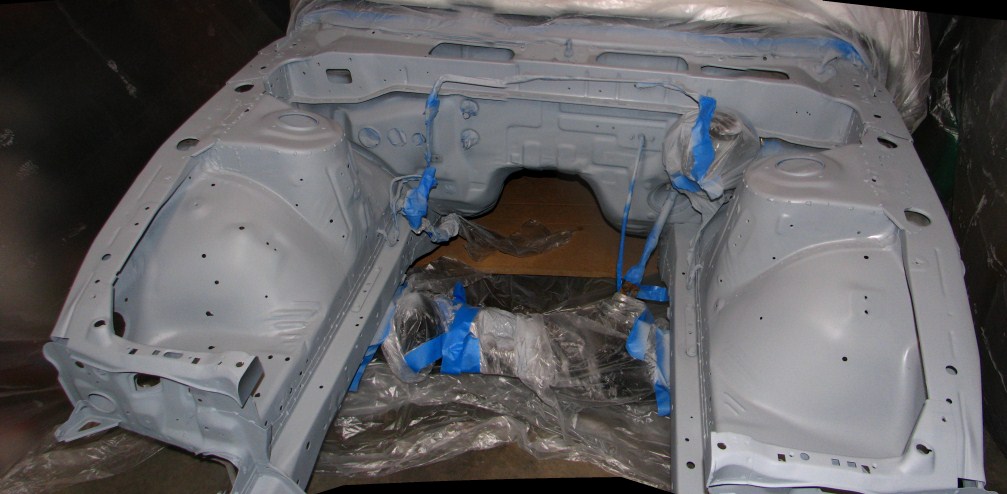
Primed the bay today. Gonna sand the primer with 400 and spray base coat and clear on Friday. Yes!
Also got the bay all stitch welded up.
So progress has been very slow. VERY slow.
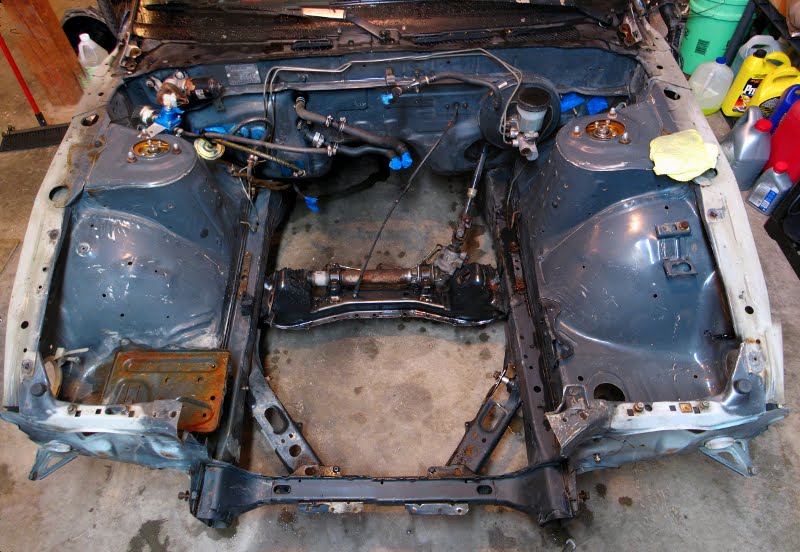
Got the bay all cleaned out today though. Degreased it and hit some areas with lacquer thinner. Gonna be cleaning it up and getting rid of all the rust. Hopefully can paint it this weekend.
Thinkin about relocating that huge battery.. If i do this do i need to put a shut off switch on the rear of the car?
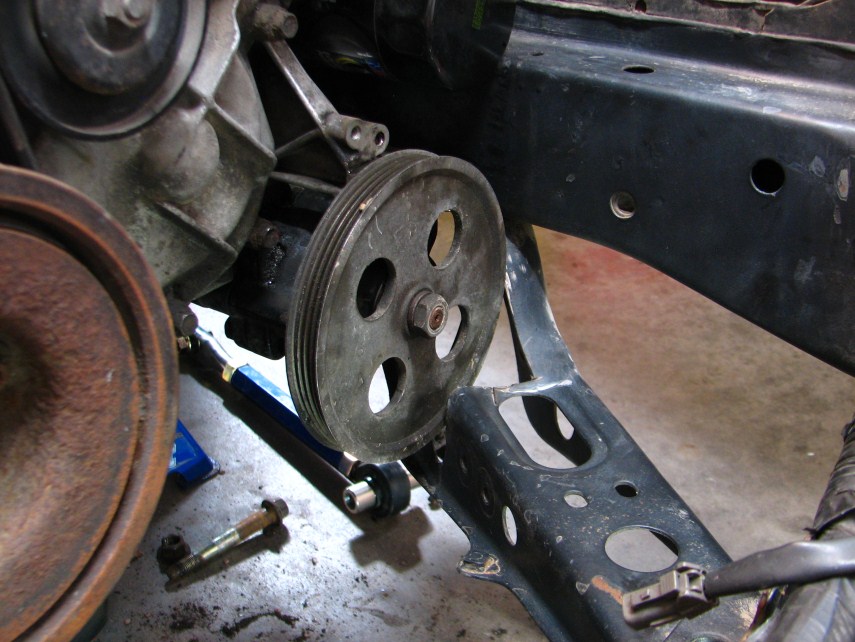
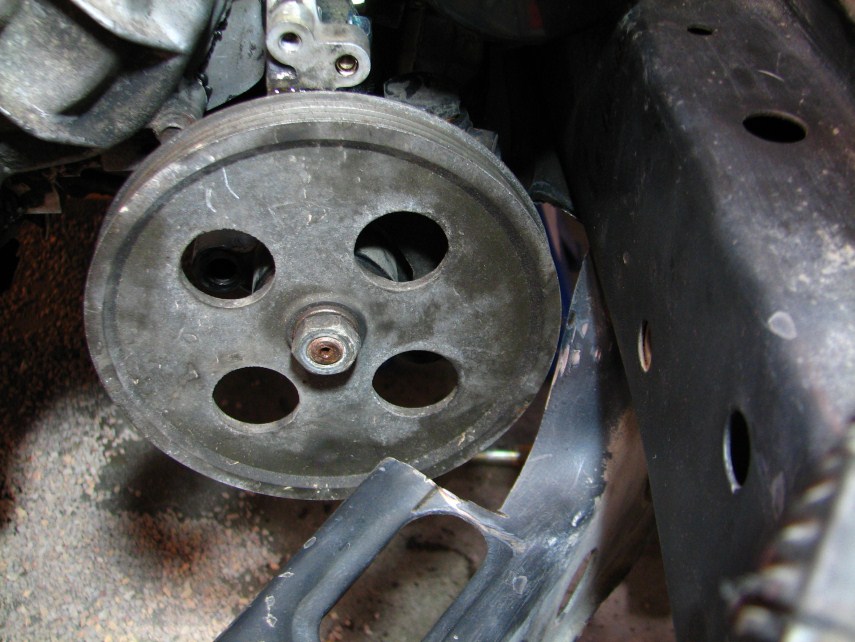
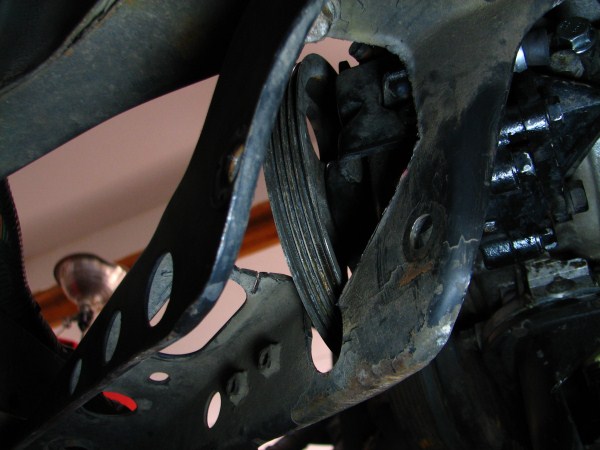
This is how bad i want PS. Only way to do it.. unless you use smaller pulley with different internals. This is what you have to do on the Mazworx kit also except not cut as much out… My engine is lower therefore i cut more. Scott did you have to cut this much out?
Anyways I’ll will be boxing it back in with quarter inch plate because i cut so much. (overkill?) Same stuff my mounts were made out of.
Small update before i go to bed.. Just got done making this thing with Gunar.
OEM bushing on left.. Custom bushing on right. Notice how much larger it is… yeah, that flywheel spacer was MESSED up.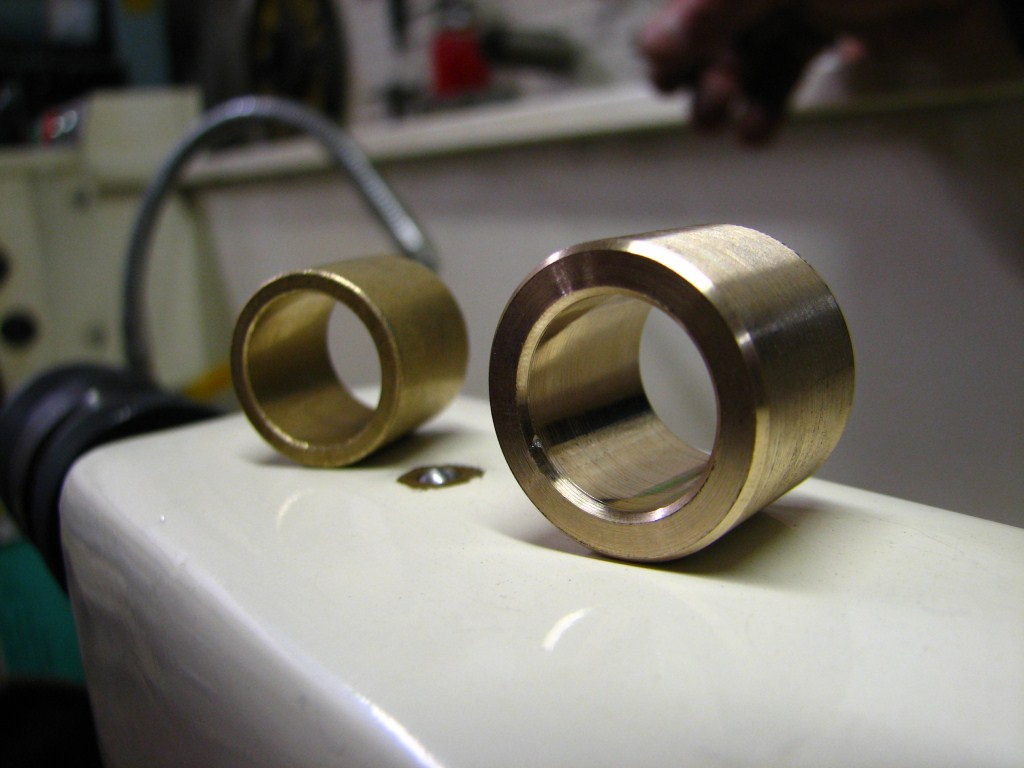 In action..
Also… just received clutch kit in the mail today so HOPEFULLY i can get this thing rolling soon. Dont think i’ll be able to work on it for at least a week though.. school is KILLING me right now.
Got some more stuff.. all thats holding me up now is the clutch kit and the MASS amounts of school work…
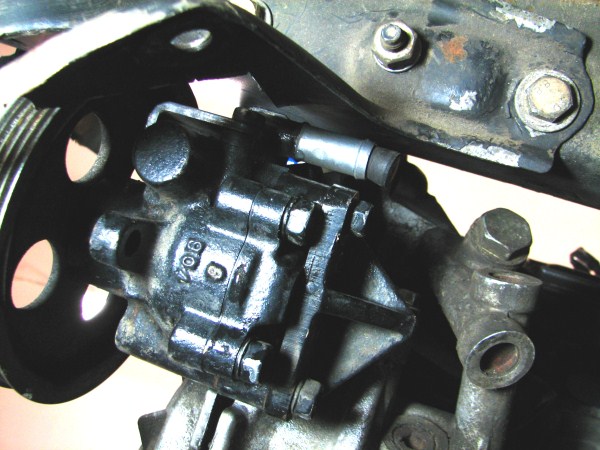
Some PS stuff from mazworx. (smiley face unintentional)
Started putting it on the car yesterday. Had to notch my tension rod bracket, but i’ll box that in later.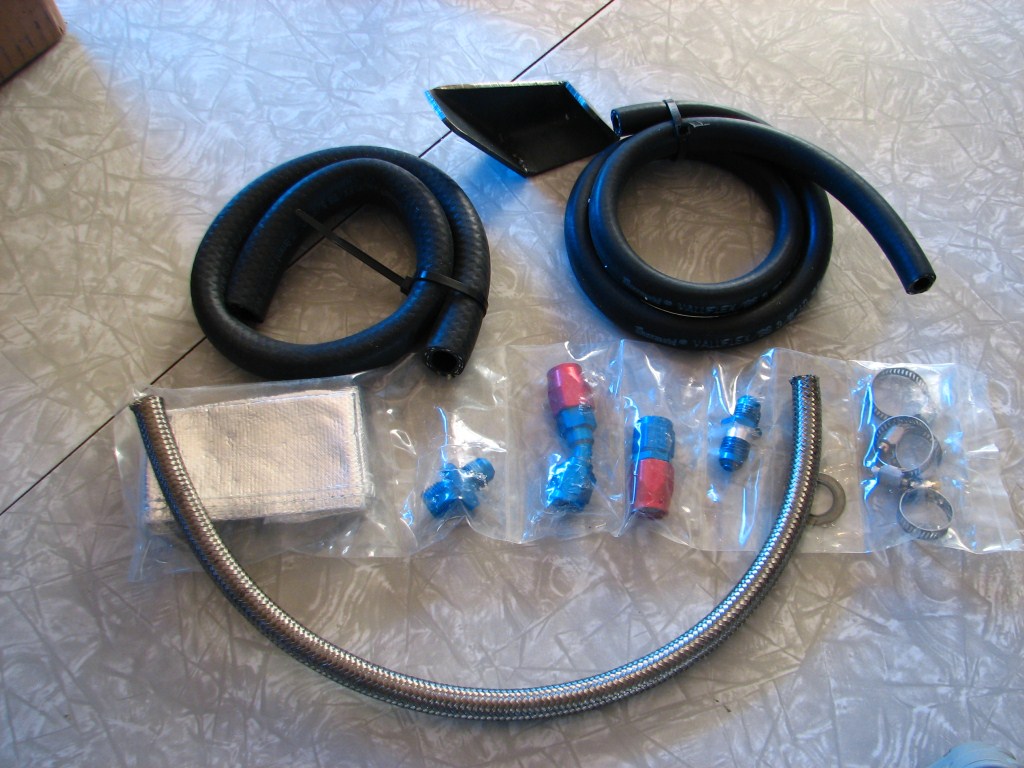
 Trans!
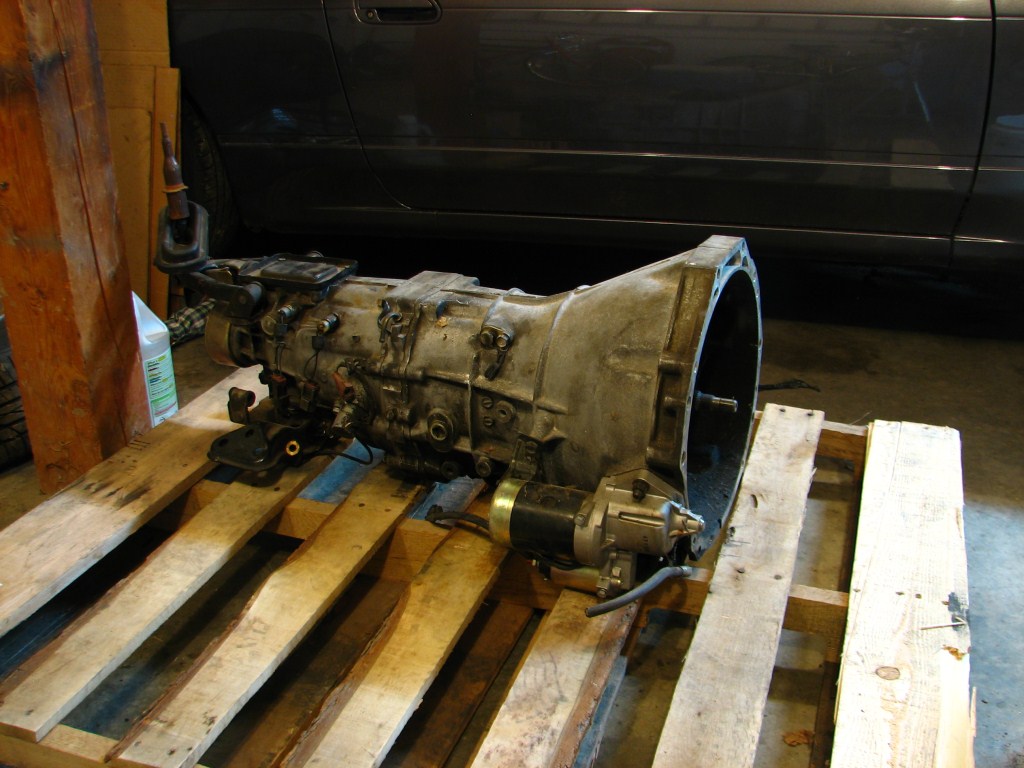 A little dirty but nothing a pressure washer cant fix.
The awesome shipping company broke the reverse and neutral switches on it, but it came with a new starter and supposedly has under 40k on the trans.
Alright, MASS UPDATE.
So this summer i didn’t get squat done as i was working like crazy djing and working on the base out here along with having fun with the girlfriend.
Anyways i also moved just recently so here’s a few pictures.
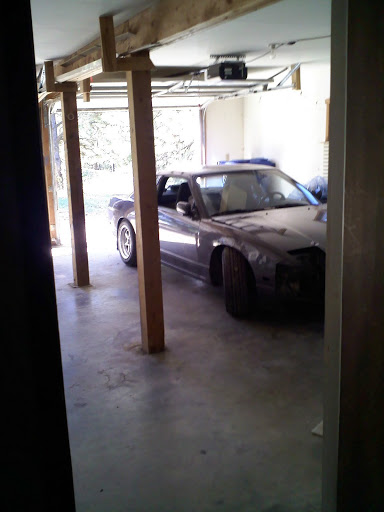
Here it is in it’s new home, much bigger garage.
One thing i did before i made the move was to fix one of my frame rails…rust.
Made this snazzy little sleeve.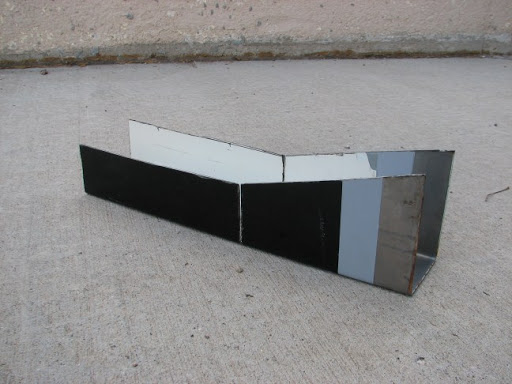
SO. recently i just purchased a ton of parts to get this thing moving again.
Pics of said parts.
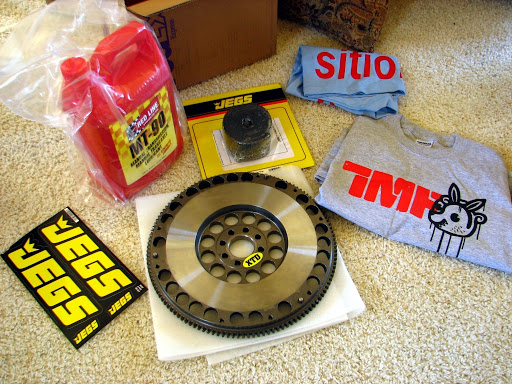
Ended up going with a lightweight flywheel from XTD. (12.5 lbs vs. i think double that stock = WEEEEEE)
And why not throw a couple TMF shirts in there for the mix (Thanks Scott!)
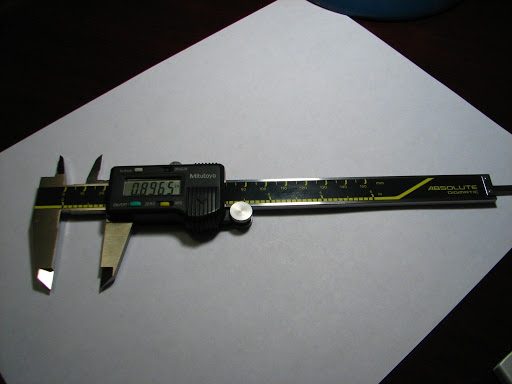
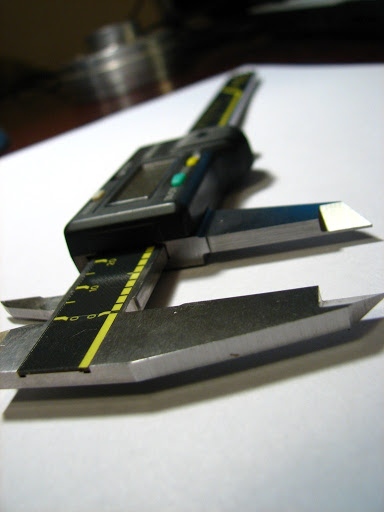
Also got myself a new toy. Helped me out with re-boring my flywheel spacer also. More on that later.
There are a lot more parts in the mail that i havent received quite yet.
Mazworx power steering line conversion (yay for PS!)
ACT 6 puck unprung clutch kit
Megan Racing Tension rods
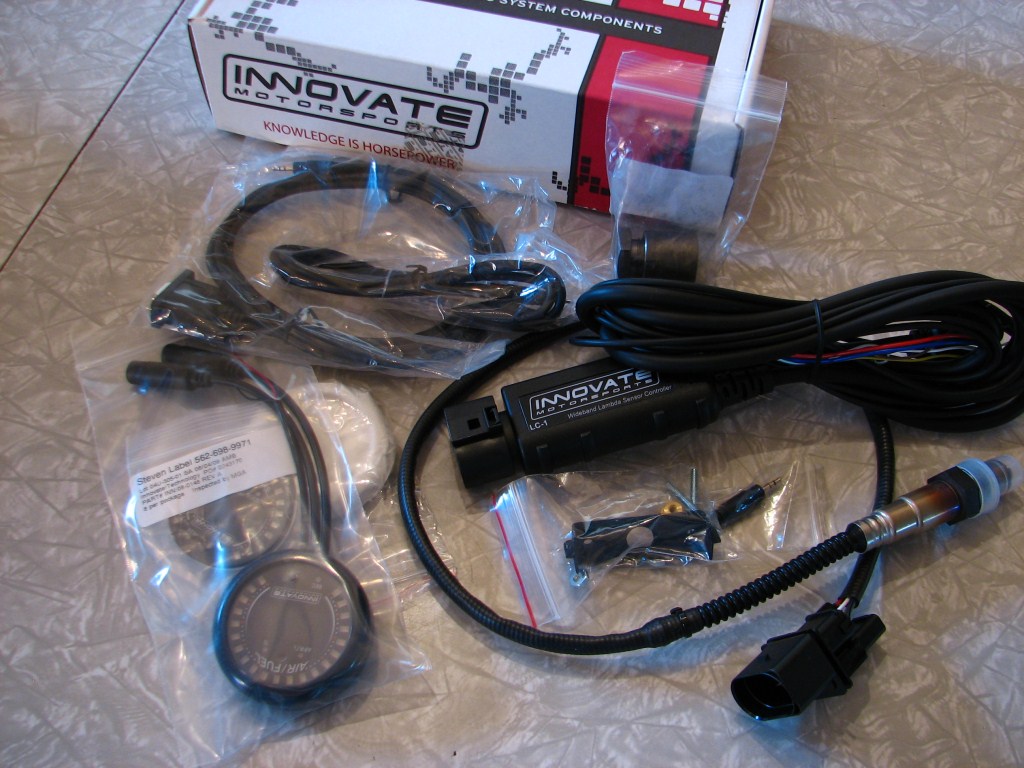
Innovative LC-1 with XD-16 gauge
and most importantly a z32 Turbo trans with less than 40k miles on it.
ECU tuned by a guy i’ve been talking with for a while about VH’s
So this flywheel spacer thing. You’ve seen pictures of it all mangled and . I was talking to my boss out on base and he hooked me up proper with a buddy of his thats got a little shop of his own.
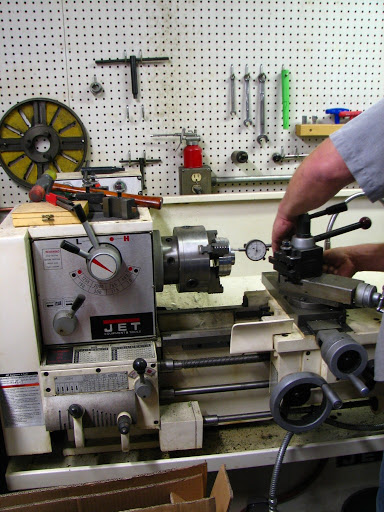
Making sure it’s on the lathe nice and true.
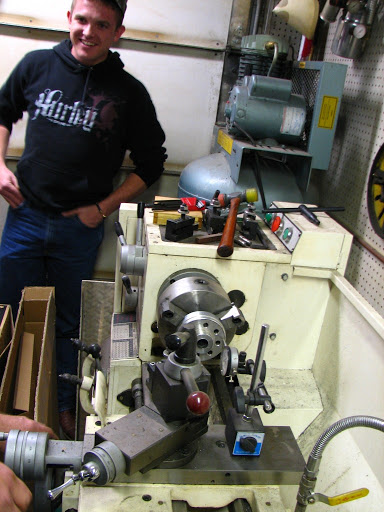
Ready for destruction. Homie Darren in the background.

The result. If you’re wondering what that step is in there it’s so the bushing doesn’t fall through to the other side.
Here it is sitting on the back of that flywheel i just got. Had to make sure it fits in it haha.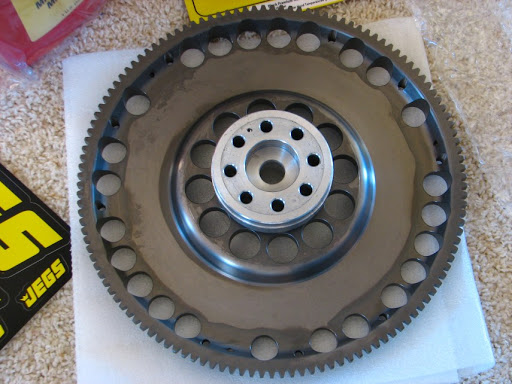
Now that we bored it out it is much larger than the bore to accept the OEM pilot bearing. What to do?
MAKE ONE

Went to the machine shop here in Rapid and bought some bearing bronze. 9 something a pound. Bought plenty in case we mess up.
Outside diameter will be around 23. something mm (cant remember) But inside diameter will be bored to the OEM pilot bearing specs. Which is around .626″ or .629″ which is just under 16mm.
Plan on getting that done sometime this weekend hopefully.
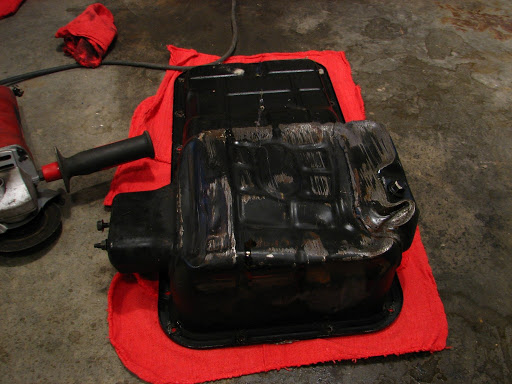
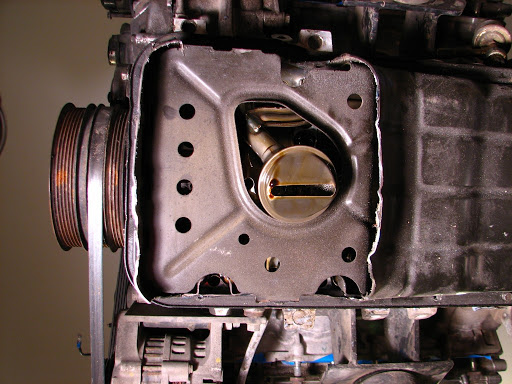
Oil Pan
I’m sick and tired of bashing my oilpan on stuff around town. I’ve done it twice in less than a year…
Here’s a pic of what i’m working with.
My plan?
Shorten it and add extensions off the side with baffles/trap doors. If you guys have ANY input here at all please let me know as i have never done this but i’ve ot a rough idea on what to do…
First cut

Final cuts

As you can see this thing came stock with a windage tray already in the pan. Along with another one bolted to the underside of the block. (cool)
I’m going to try and keep that there while raising the bottom of the pan. But as you can see in the next picture i’ve also got to cut and re-weld the pickup tube in a higher location. I’m thinking about 10-15mm of clearance between the pan will be about right. (Any input here??)
You can also see where i plan to ad dthe extensions off the side..
So i bolted the cut up pan to the engine to see how everything sat…

This last picture is of it with the engine sitting in the bay so i can see how low it’s still hanging below the cross member. To me it looks to be about flush with it or it just slightly hangs below the cross member.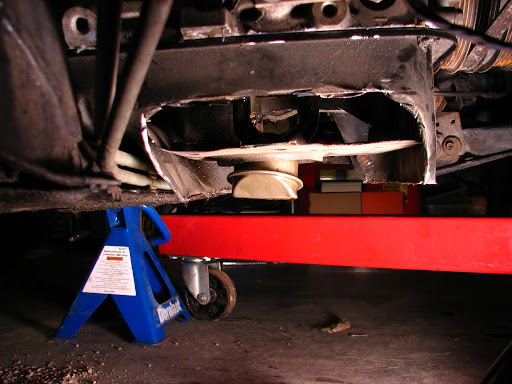
I’m thinking about putting some spacers in my engine mounts to raise the engine up a little bit as it will help with clearance of the pan, exhaust, and PS pump. Only issue is that its going to hit the hood more……
SO there you have it. I will probably be posting quite a bit more pictures as stuff gets done and parts come in as i REALLY want to get this thing running soon. Want to tear up the street one more time before winter fully hits! (Even though it just snowed today lol) But i’m banking on one more dry week haha.
Alright! Getting pretty close to being updated to the present. Just so you all know my car still isn’t running from this last incident BUT i’ve got all the parts to fix it. I don’t even want to think about all the money I’ve spent recently…. Anyways, get ready for a crap ton of pictures soon as I’ve done quite a bit in the past few months.
– Chase
Carnage again!
The latest catastrophe?
Broken transmission and clutch. AND flywheel spacer.
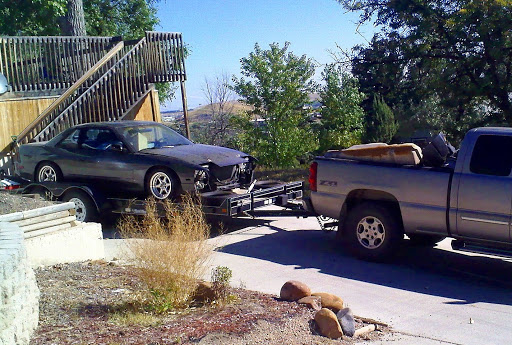
SO i was merging slowly onto the interstate in 5th gear and all of a sudden it sound like my transmission popped out of gear and made the most horrid grinding noise in the world. Long story short i towed it back to my house with my house with my room mates truck. I finally got around to tearing it apart to find out what happened.
Here are carnage pictures. (Sorry for them all being crapy cell phone pics, couldn’t find my better camera)
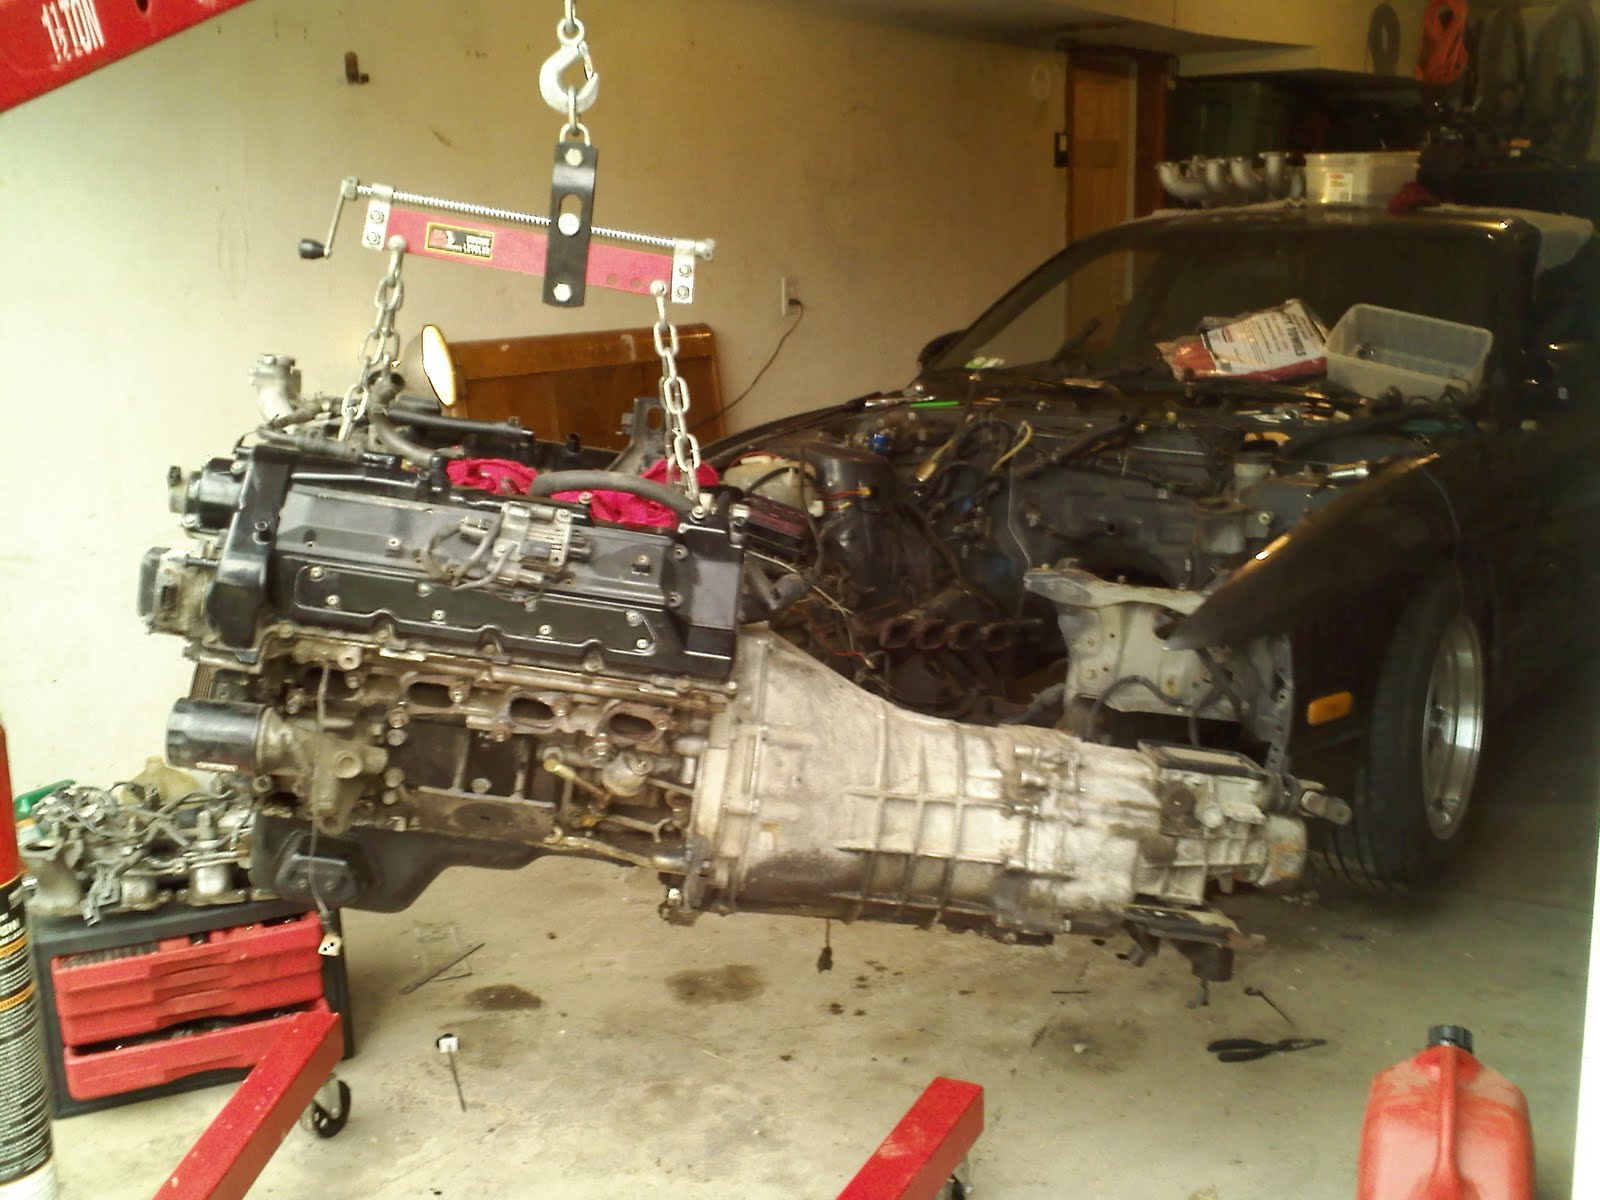
Engine pulled.
Clutch disc’s teeth on my ACT 6 puck unsprung completely stripped off…

This is what it SHOULD look like. (minus the busted out spring up top, was from my first RPS clutch that blew up on me)
Hard to see but transmission splines are messed too. Some actually look to be BENT

And my hacked up flywheel spacer.
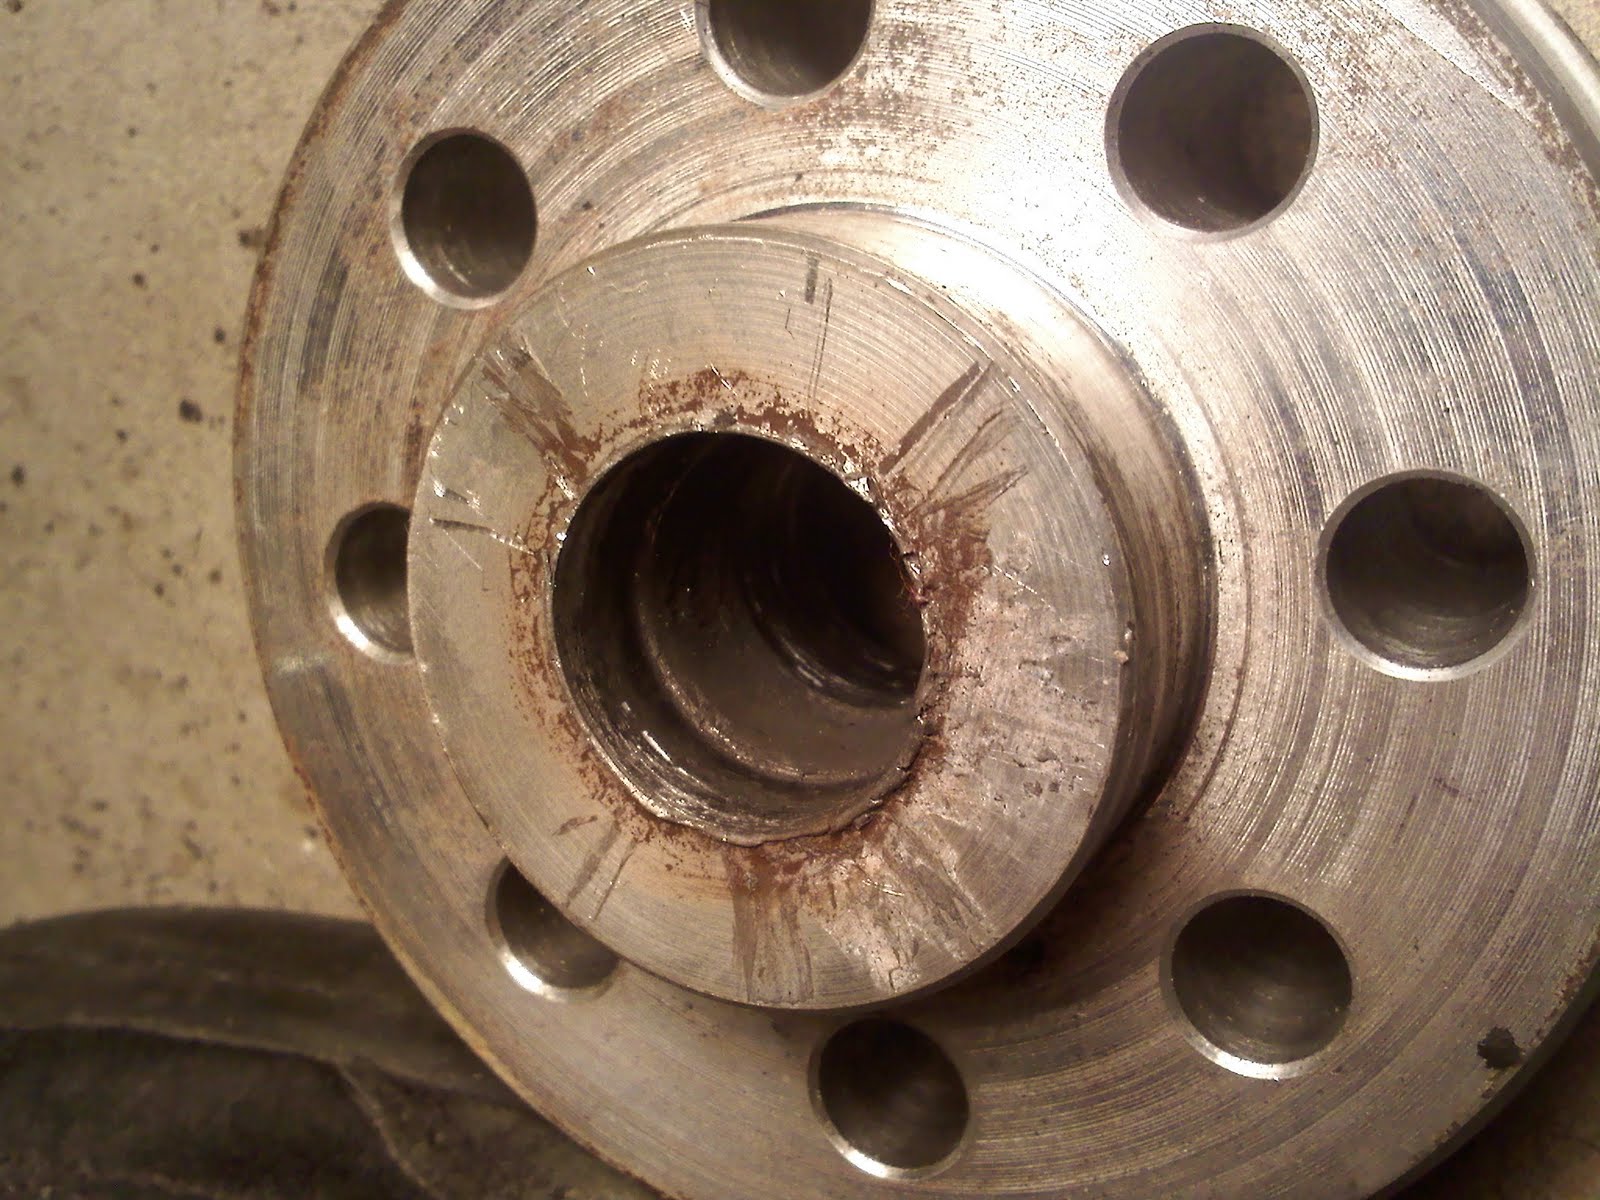
The story with the spacer is that i didnt have a pilot bearing in. Basically it was something i did two summers ago. When i was putting this thing together with the original RPS clutch i had, i tried bolting the transmission up and it wouldn’t go on using the pilot bearing supplied by RPS. It wouldn’t go on all the way. Took it back apart and found the pilot bearing was hitting part of the transmission input shaft where the spline starts after the tip for the pilot bearing. So i think what happened was i took out the pilot bearing and never used it. I remember a friend telling me he never had one in his car either and it was fine. So i wasn’t TOO worried about it at the time. I think i figured the difference was that i was using an N/A z32 transmission instead of the turbo one which is what the adaptor plate setup was designed for. (i remember reading the were identical besides their clutches) Anyways thinking back on it now i was really dumb about that and in too much of a hurry and paying for it in the end. As you can see the inside of the spacer is completely hacked… and i’m not sure but no pilot bearing might have been a part of it.
Also, i check online. The part number of my ACT disc is 6240006. Which is the correct part number for my application. 90-96 300zx Non-Turbo. It also happens to be by coincidence the same part number for the 79-83 Turbo 300xz. But thats just a clarification that i wasnt using an incorrect disc..
And now i dont know about you guys but i’ve NEVER seen anything like this happening. Even daily driving it i’ve seen the metal twist apart on the clutch disc from using an unsprung but never the splines…
Pretty sure a combination of a welded diff, 1-piece driveshaft, unsprung clutch, and nearly solid engine mounts combined with it being daily driven had a part in this…
